TL;DR;
There isn’t much to say here if you don’t want to read the whole article. If you follow this procedure you will be able to run Windows 10 from an external SSD drive. 😎
Disclaimer
The links in the article are Amazon affiliate links that will help me monetize the site and pay some of the costs of keeping it alive. At the end of the post, there is a section with links that don’t have the affiliate code in them.
Before we start
As I wrote in a previous post, one of the things that I want to able to do is working efficiently in the three most common operating systems: macOS, Windows 10, and Linux. In this post, I share with you the procedure that I followed to install and run Windows 10 from an external SSD USB Drive
This is all the hardware and software that I used:
- A Windows 10 Pro License Key
- An external USB to download and save the Bootcamp Windows 10 support files. I’m using a Kinstong Datatraveler of 64Gb but any USB stick of 4GB size will be more that enough
- An external SSD (I’m using a Samsung 860 Pro )
- Virtual Box
- External USB keyboard (recommended) I have a very basic
Perixx Periboard-407
that I use as an emergency keyboard. It was very handy during the installation since it saved me a few steps. - External USB mouse (recommended) I have a Logitech B100 emergency USB mouse
- If you have Mac with T2 Chip, we will need to loosen some security settings after the installation to be able to boot from the external drive. We need to be fine with that.
After gathering all the hardware, the first thing we need to do is download and install Virtual Box in our mac. We can also use VMWare Fusion, Parallels but I chose Virtual Box because it’s open source and free to use.
We will also need the Windows 10 ISO image, which can be downloaded from the
Microsoft website. According to the downloads page,
it’s important that we select the same language that we will use later during the installation. We choose
English international and download the 64-bit ISO file.
Format the external USB
⚠️ This step will erase all the data in your usb stick. Make a backup of any file you don’t want to loose. ⚠️
We will use the external USB drive to copy the Bootcamp Drivers from the MAc and install them later in Windows.
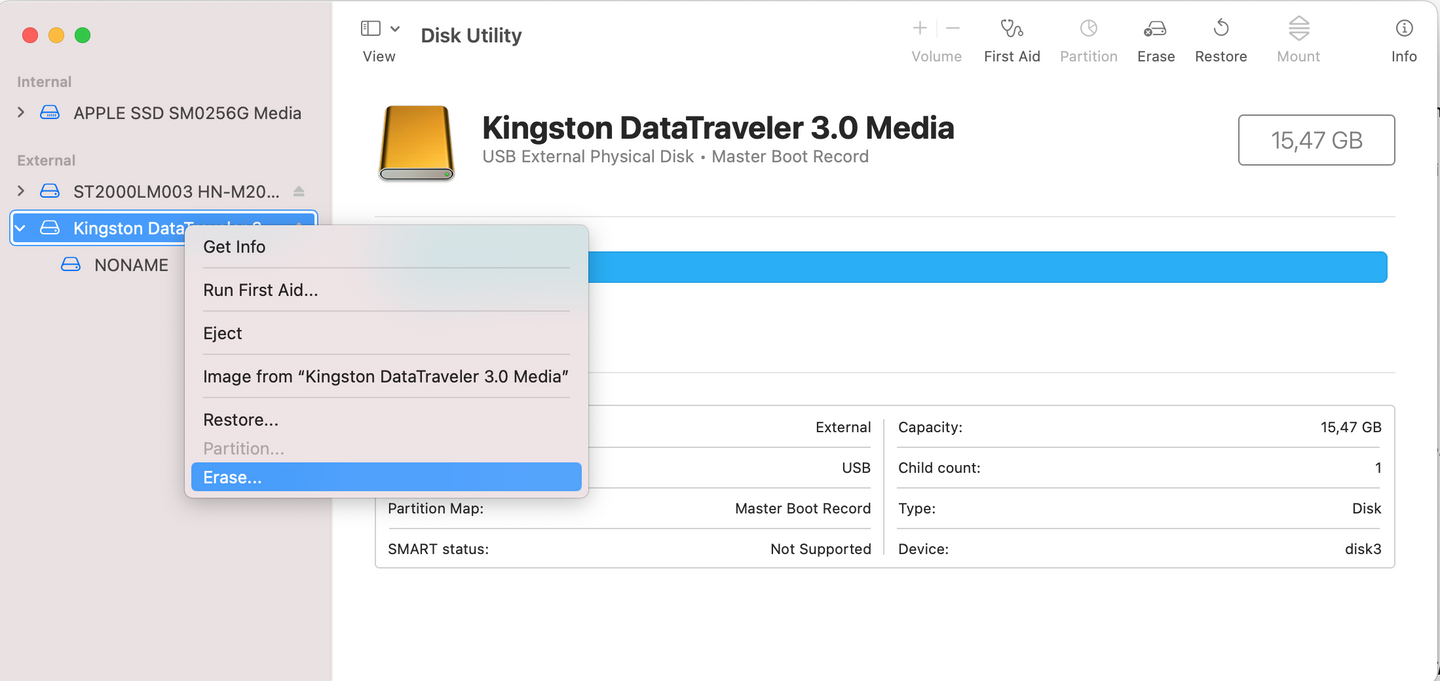
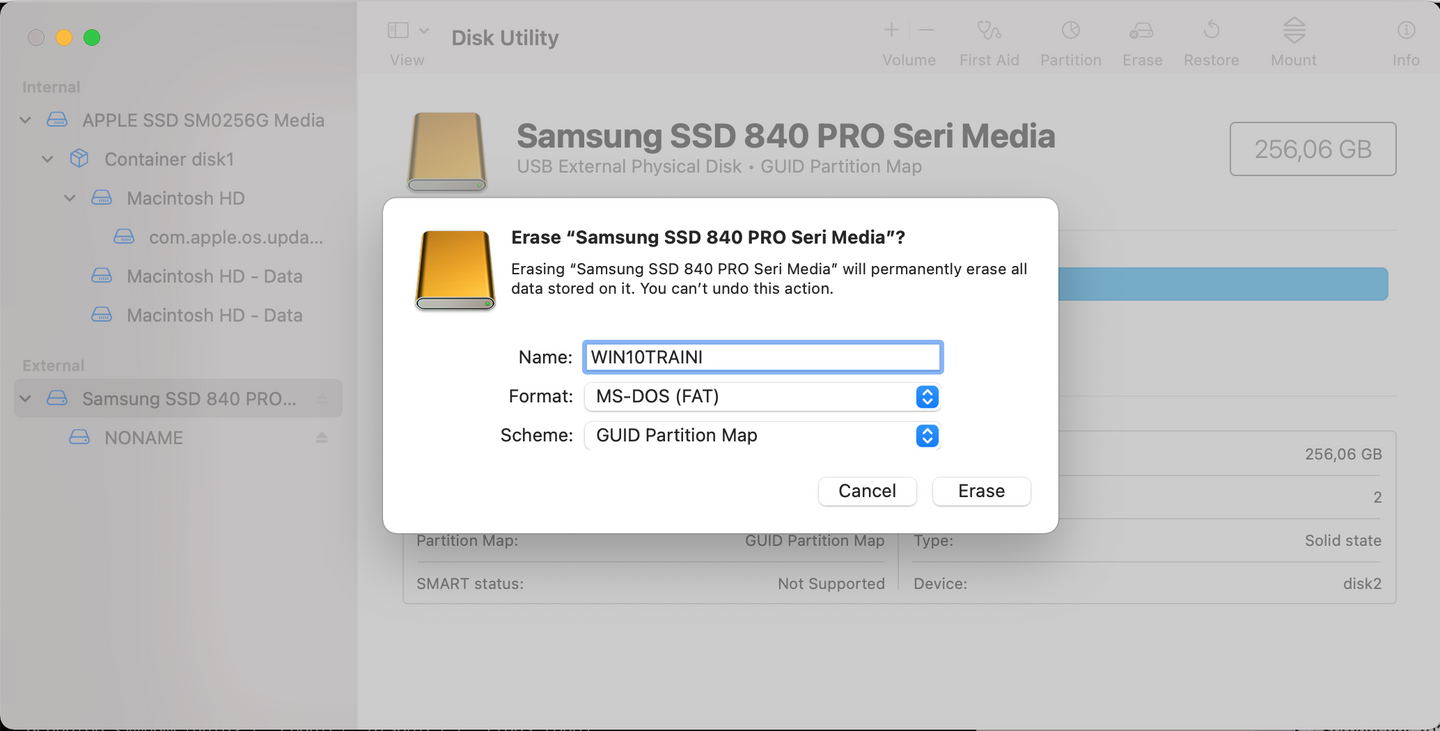
Insert the drive and open the Disk Utility application. Once opened, we go to the menu View -> Show All Devices (or
use the CMD+2 shortcut). Once we can see all the volumes, we select the USB drive, right-click on it and select Erase
in the secondary menu:
In the dialog window we select the name of for the Drive (we will use BOOTCAMP), an ExFAT format and a Master Boot Record
scheme:
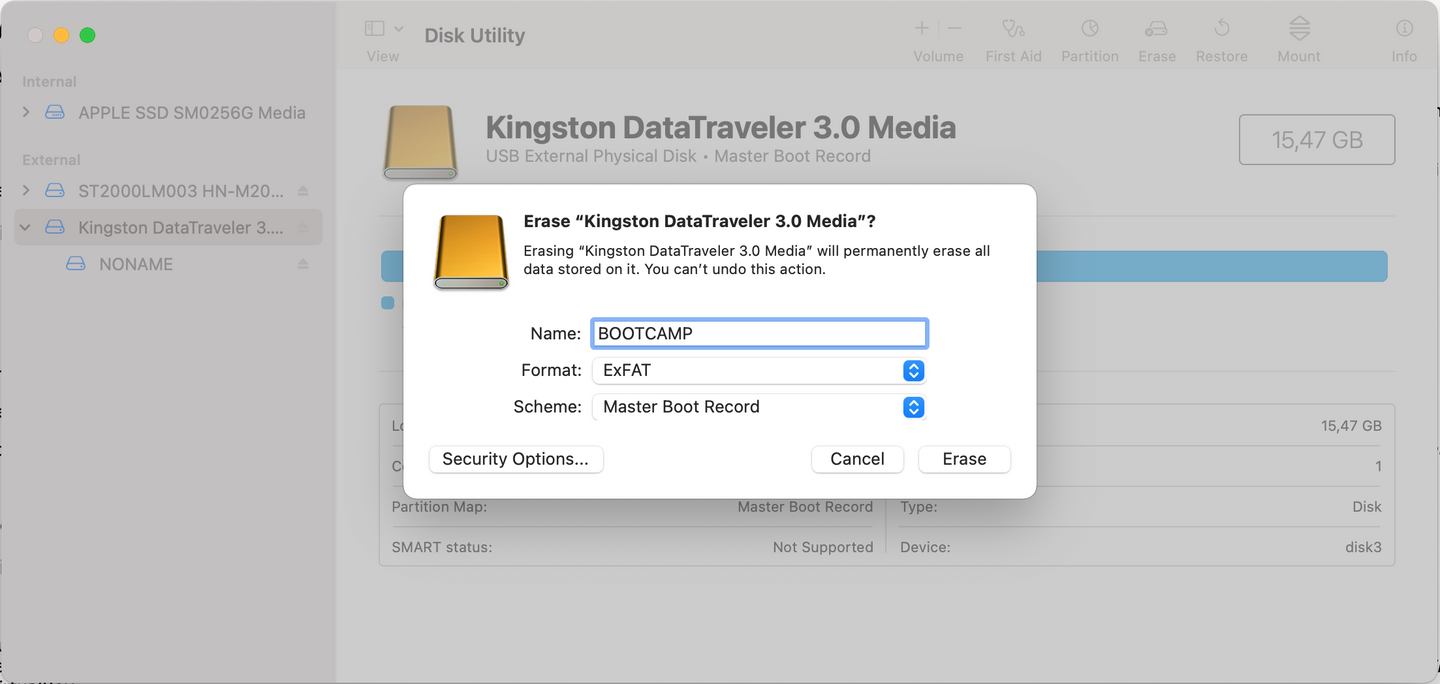
Wait while the drive is formatted and close the Disk Utility application once it’s done.
Boot Camp Windows Support Software
Once the USB stick has been formatted, we will copy the Windows Support Software to it.
Open the Boot Camp Assistant application and select Action -> Download Windows Support Software. This will open the
following dialog window in which we will select the BOOTCAMP drive:
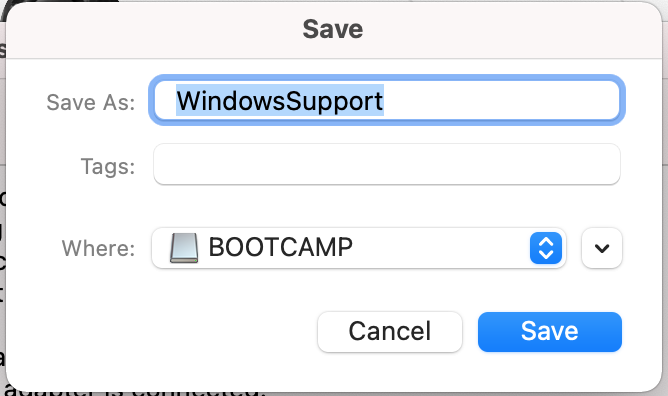
It can take a few minutes (12 minutes in our case) for the software to be downloaded and saved into the USB stick, so have a little patience.
There is an Apple support article describing this process here.
Format the SSD drive
Plug the SSD drive, open the Disk Utility application again and erase the drive using the following parameters:
Prepare Virtual Box to install Windows
You might be tempted to burn the iso image to a DVD, boot from it, and install it. Unfortunately, that will not work. The installation program will complain that it cannot be installed into a USB drive and you will not be able do it this way.
We need to trick the Windows installation program into thinking that our USB external drive is an internal one. We will use Virtual Box to do the trick.
We plug in our external SSD drive and run the command diskutil list:
% diskutil list
/dev/disk0 (internal, physical):
#: TYPE NAME SIZE IDENTIFIER
0: GUID_partition_scheme *251.0 GB disk0
1: EFI EFI 209.7 MB disk0s1
2: Apple_APFS Container disk1 250.8 GB disk0s2
/dev/disk1 (synthesized):
#: TYPE NAME SIZE IDENTIFIER
0: APFS Container Scheme - +250.8 GB disk1
Physical Store disk0s2
1: APFS Volume Macintosh HD - Data 67.3 GB disk1s1
2: APFS Volume Preboot 303.6 MB disk1s2
3: APFS Volume Recovery 1.2 GB disk1s3
4: APFS Volume VM 2.1 GB disk1s4
5: APFS Volume Macintosh HD - Data 35.4 GB disk1s5
6: APFS Volume Macintosh HD 14.9 GB disk1s6
7: APFS Snapshot com.apple.os.update-... 14.9 GB disk1s6s1
/dev/disk2 (external, physical):
#: TYPE NAME SIZE IDENTIFIER
0: GUID_partition_scheme *256.1 GB disk2
1: EFI EFI 209.7 MB disk2s1
2: Microsoft Basic Data WIN10TRAINI 255.8 GB disk2s2
Find our external disk, which was /dev/disk2. Make sure that the drive is plugged in but no volume is mounted.
Otherwise, the next command will fail.
We create a .vmdk file for Virtual Box:
> sudo VBoxManage internalcommands createrawvmdk -filename win10training.vmdk -rawdisk /dev/disk2
RAW host disk VMDK file win10training.vmdk created successfully.
The command above will create a drive reference for Virtual Box that is pointing to the SSD in which we want to install Windows. Remember: This command will fail if any volume in the drive is mounted.
Once the command is done, we will end up with a file win10training.vmdk that will be located in our home directory. It’s very likely that after running the command, the volume in the file will be mounted, so we have to unmount it again.
Once the vmdk file it’s in place, we create a virtual machine to install windows 10. Open virtual box with admin rights:
> sudo /Applications/VirtualBox.app/Contents/MacOS/VirtualBox
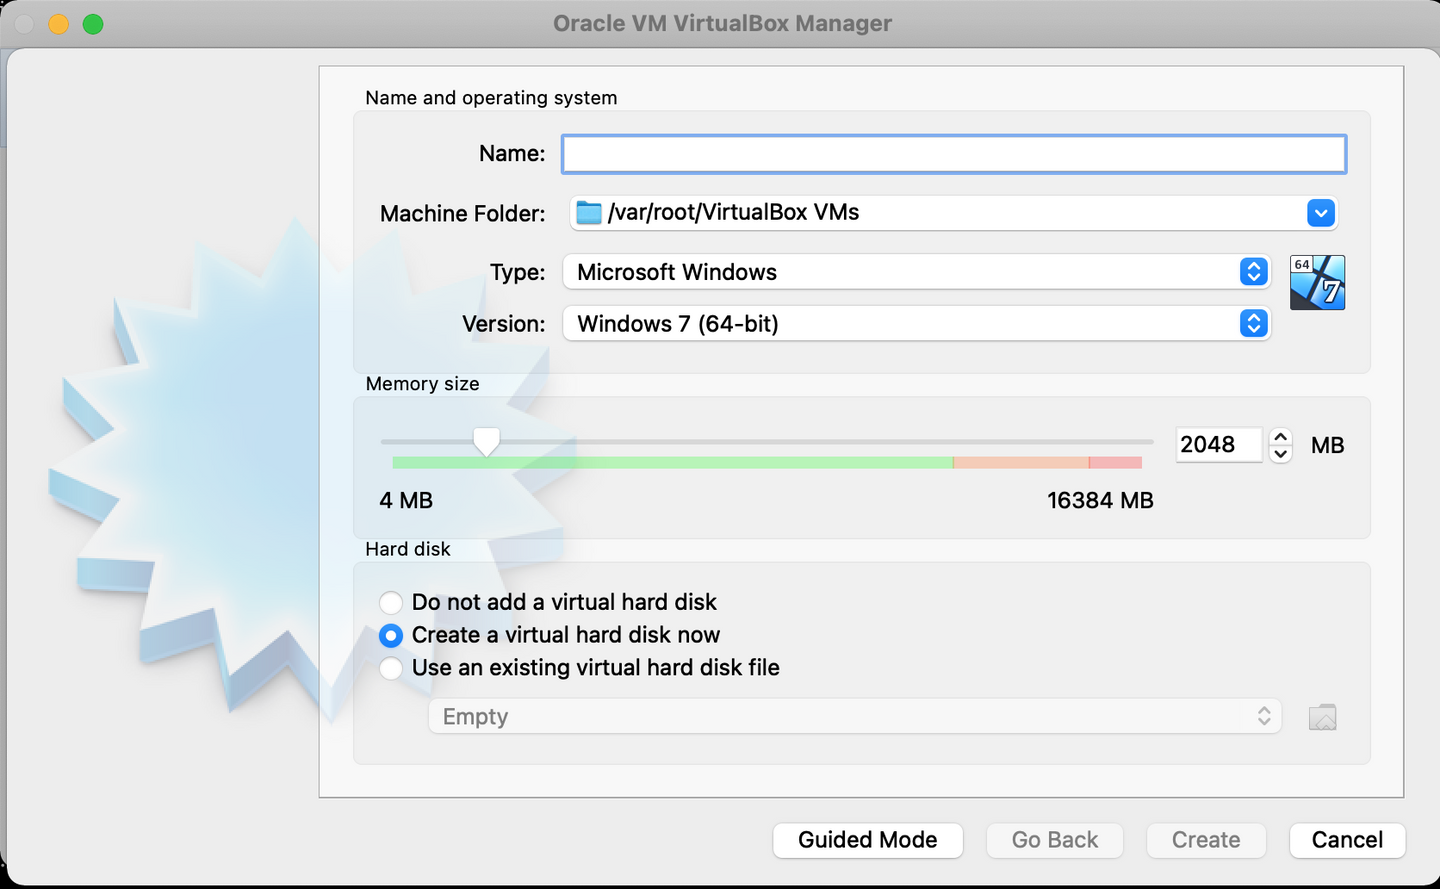
Go to Machine -> New (or press CMD+N) and click the Expert mode in the dialog window that pops up:
In the bottom of that screen, select the option “Use an existing virtual hard disk file” and click on the icon on the right:
![]()
This will open a new dialog window. We click on the Add icon on the top left:
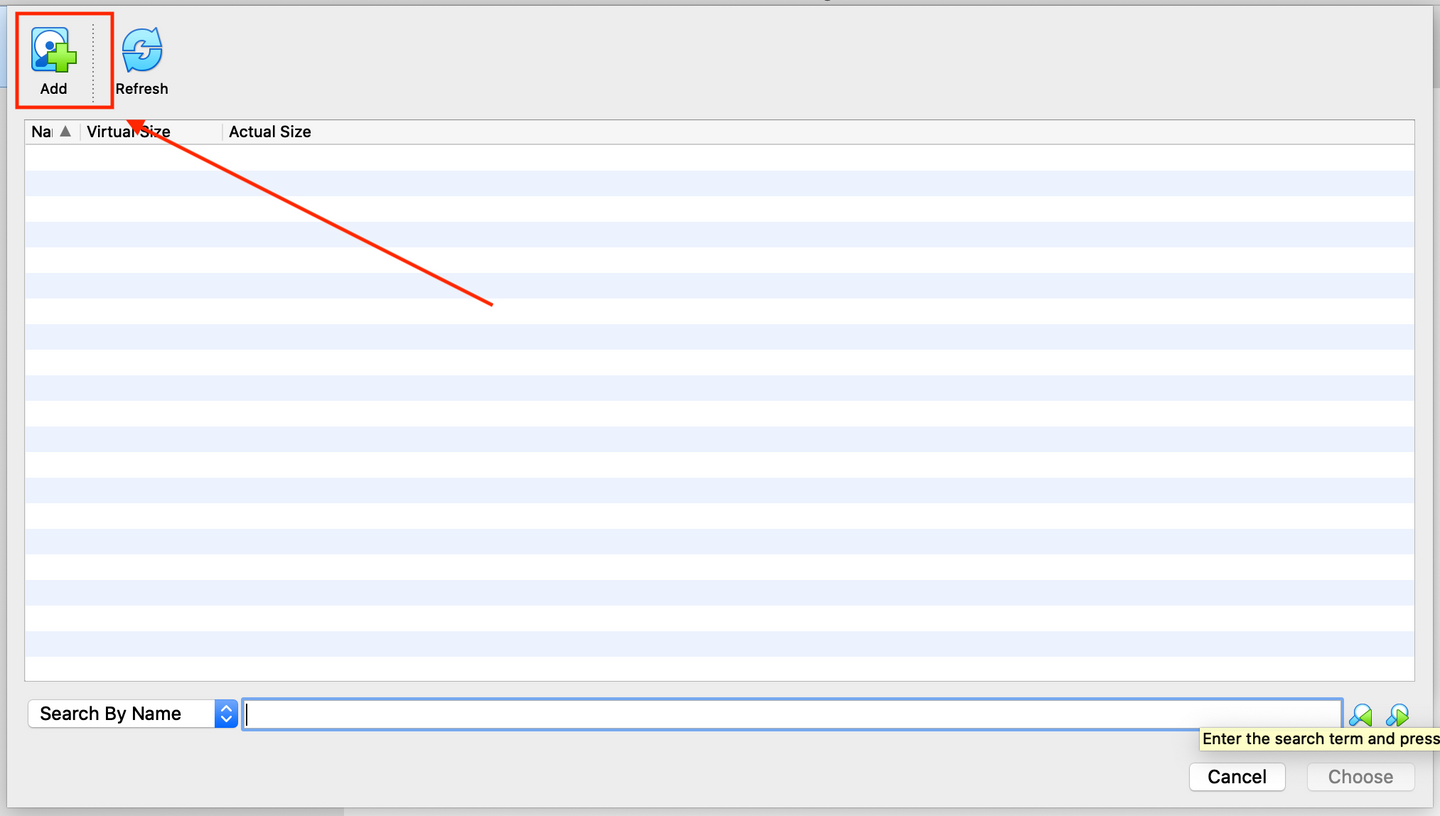
We browse and select the file win10training.vmdk that we created before:

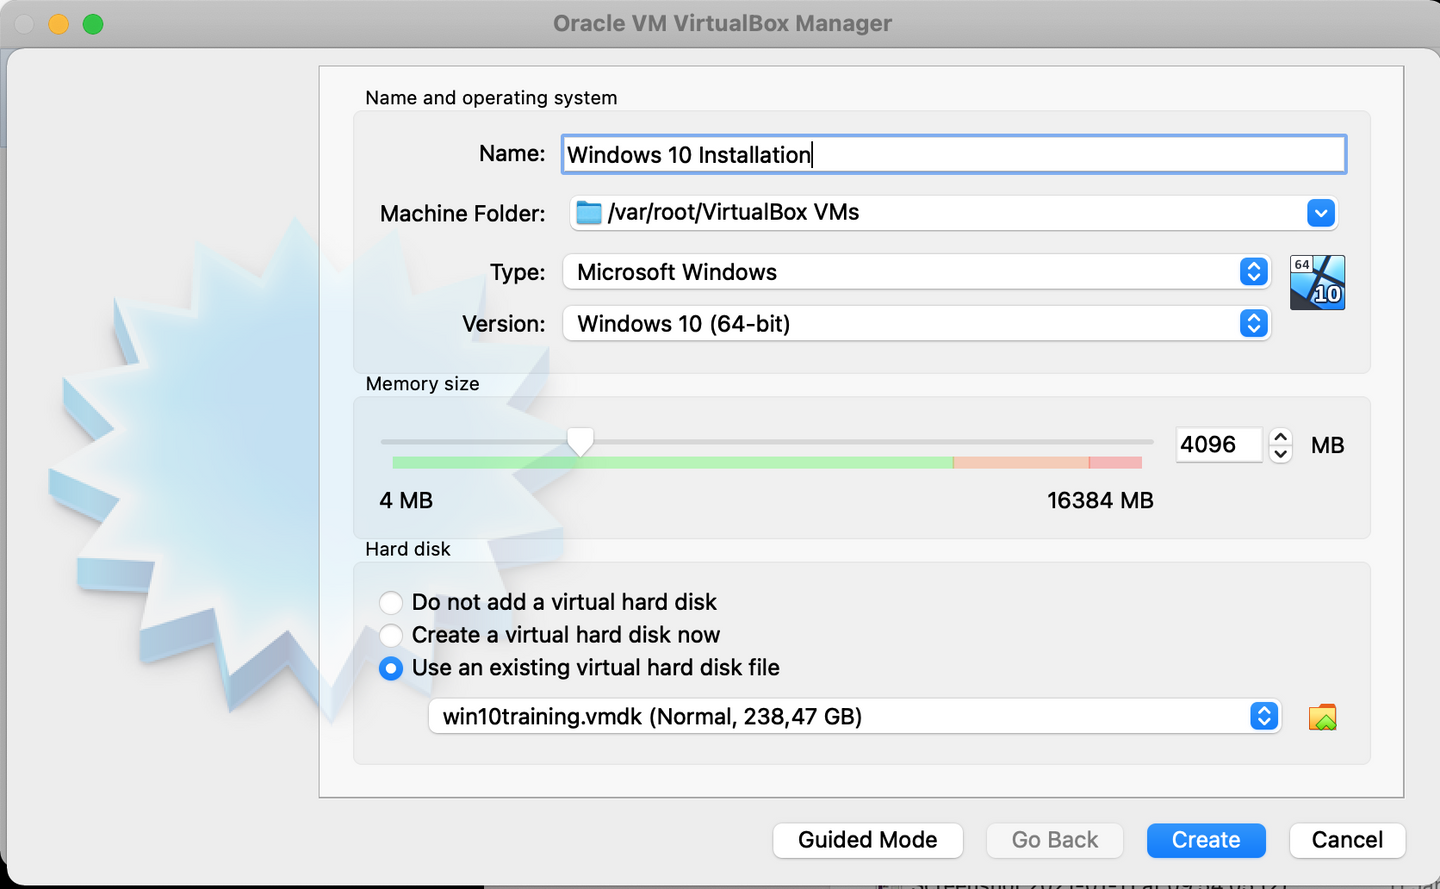
We select the win10trainig.vmdk file and click on choose to close the window. We will be back to the Expert mode window, in which
we will enter a name for the virtual machine (Windows 10 Installation) and we will make sure that the machine
will have enough RAM to run the installer. After that, we can click on create:
We are almost there. The next step is to attach the iso image to the virtual machine. We select the machine on the left and go to general settings:
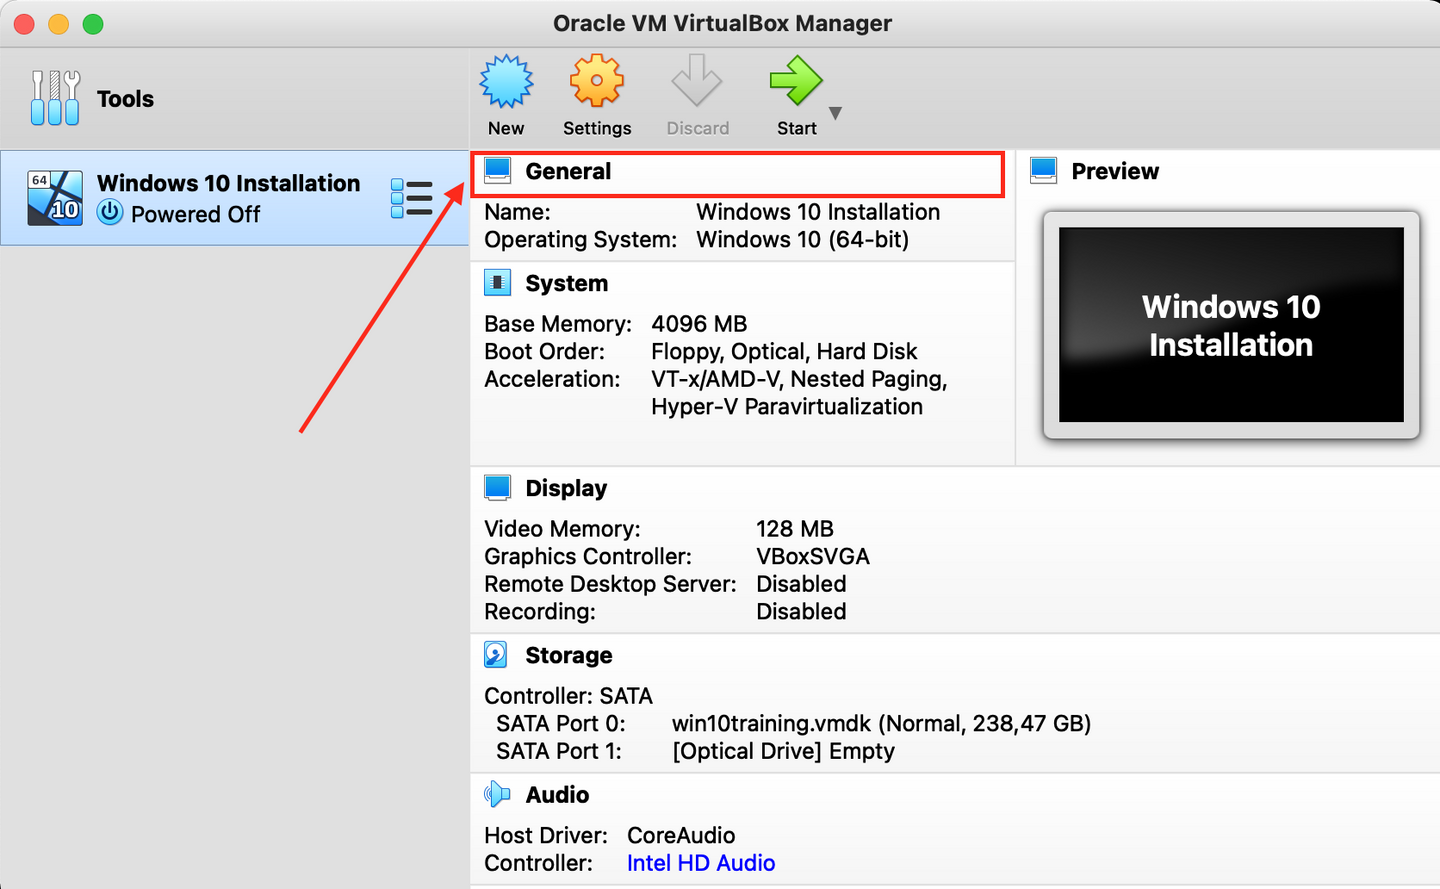
In the settings window, we go to storage and select the empty CD on the left and click on the small CD icon to the right of the “Optical Drive” option. Then select the option “Choose a disk file”
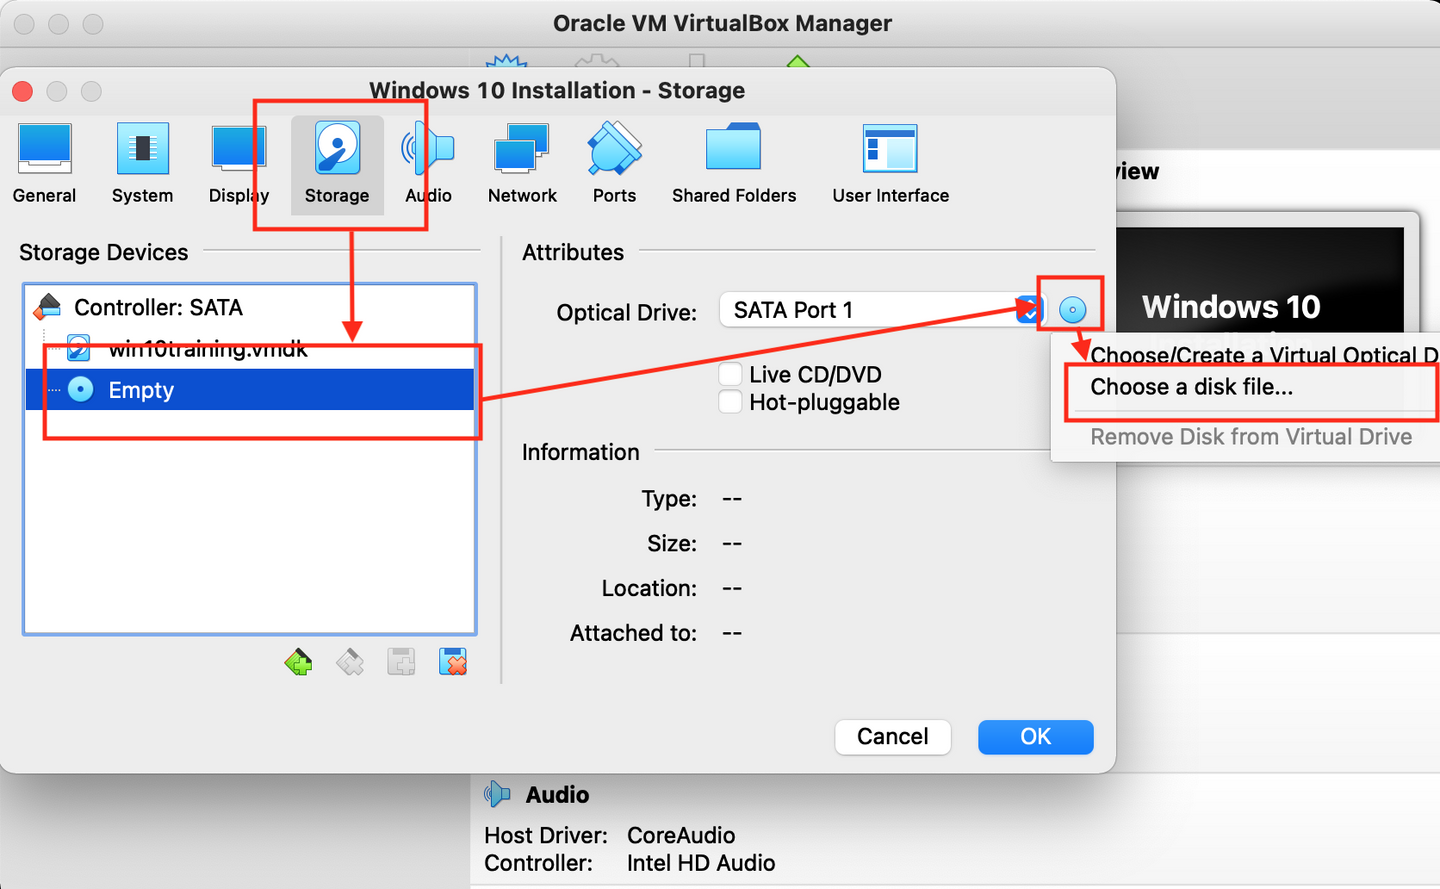
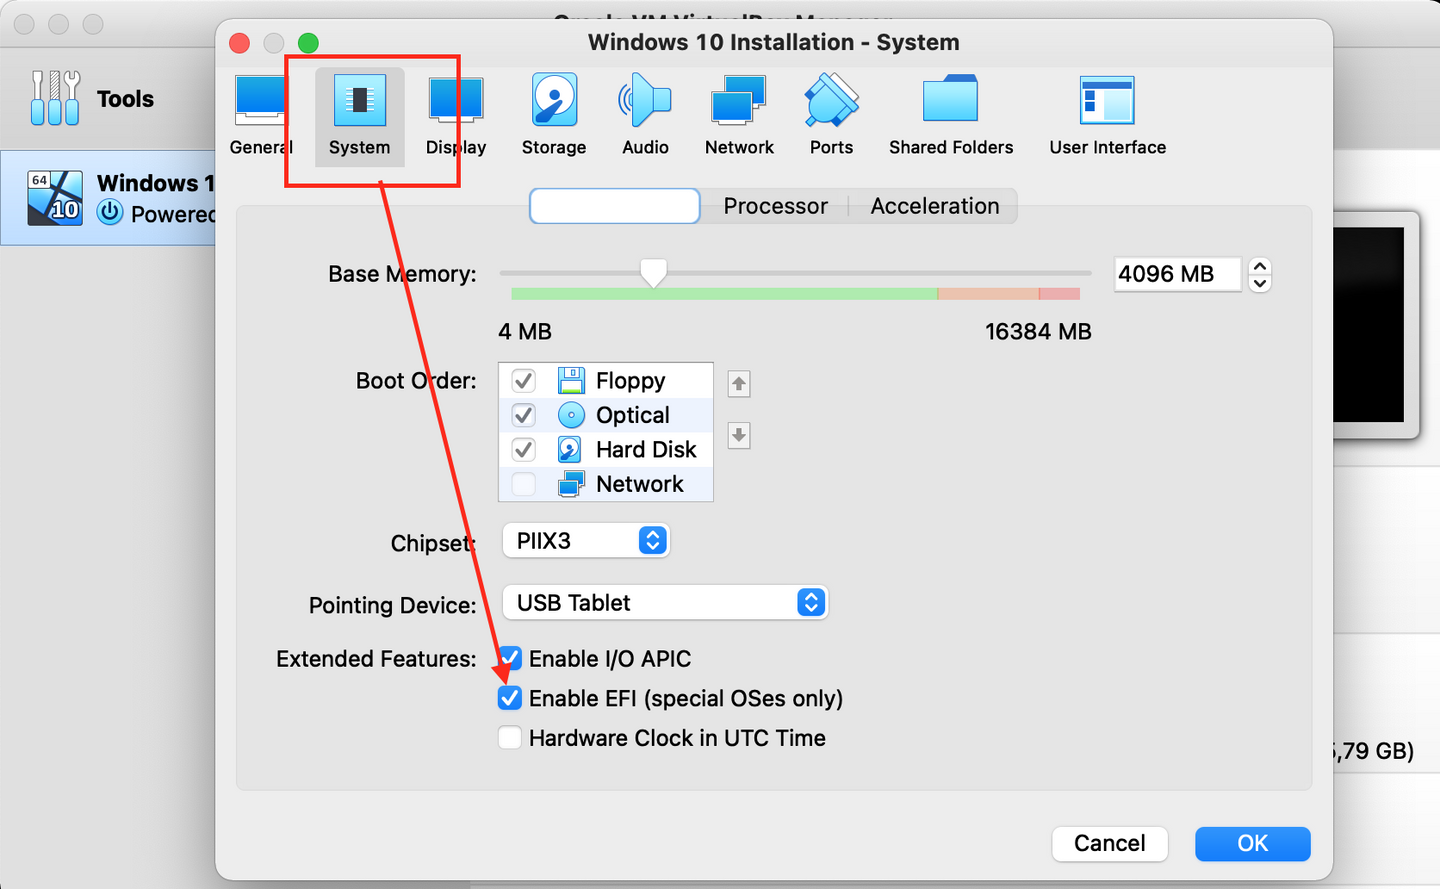
We select the Windows 10 ISO file that we downloaded before. Without closing the settings window, we click on the “System” icon and activate the option “Enable EFI”. Close the window.
We are ready to install Windows 10!
Optional step
Since the Windows 10 ISO doesn’t have the drivers for the keyboard, the trackpad, the graphics card, and the wifi network device, none of them will work during installation. If you have an external USB keyboard and mouse, you can skip this step and continue to the installation. If not, you can use the procedure describe in this post to include all the drivers in the ISO image so you will have them available during the installation.
Install Windows 10
It’s time to start the installation of Windows 10. Power on the virtual machine and start the installation process. After you power on the virtual machine, we will need to press a key to boot from the virtual CD drive! Remember to do it or we will end up in a terminal shell and will need to reboot.
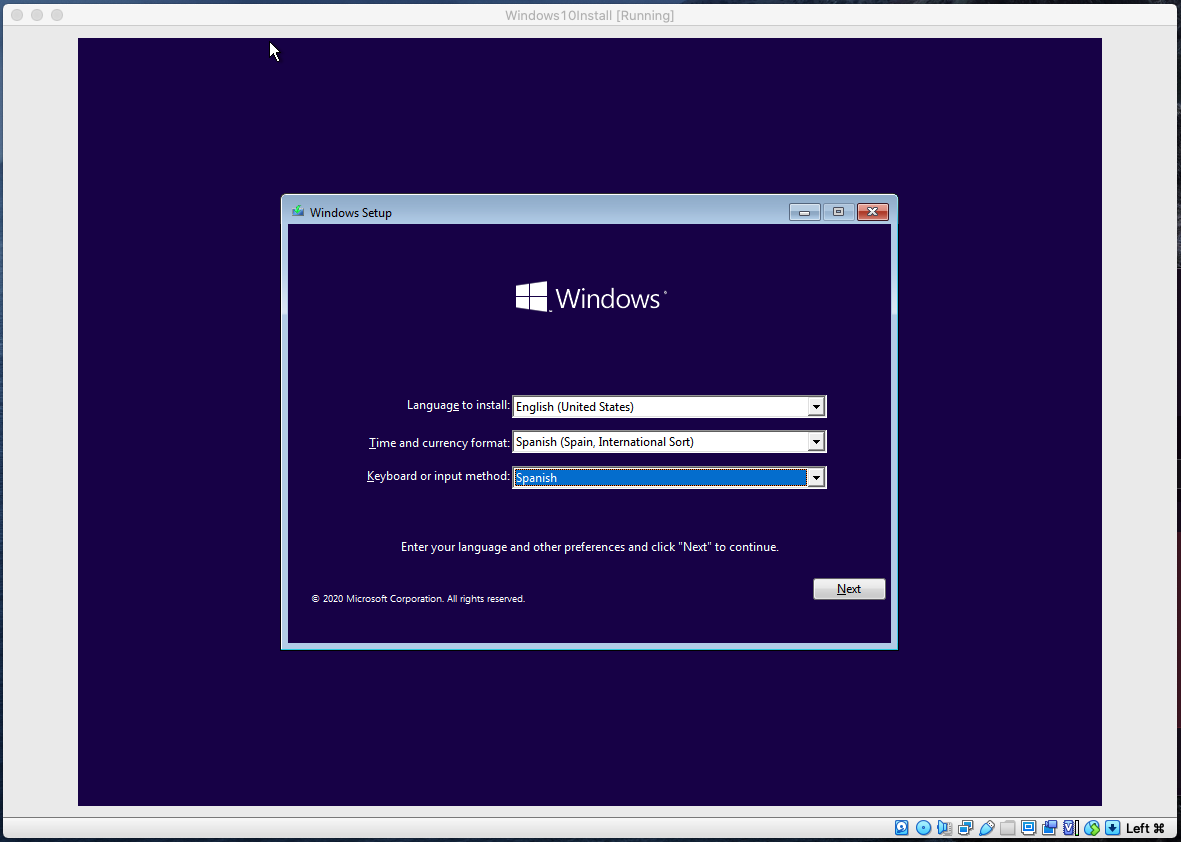
We select English as the language and then we select the custom installation. When you are asked about the partition, we kept the EFI partition, removed the FAT partition that we created before and create a new partition using the installer.
After doing that, continue answering the different questions of the installer until the installation begins:
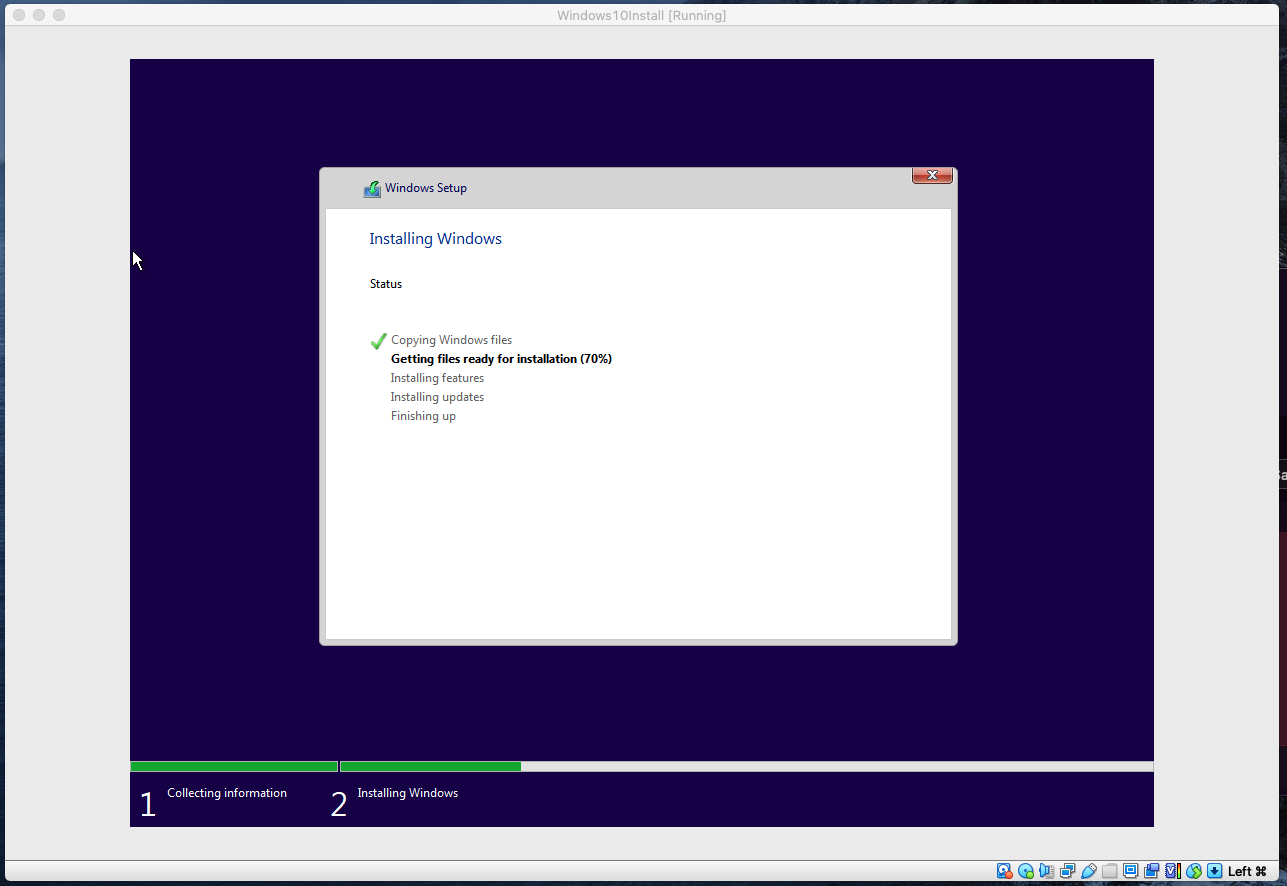
Continue the configuration and let the installer install windows. ⚠️ But do not let the installer restart, when the installer is about to restart windows you should stop the virtual machine. You have ten seconds before it restarts after the installation.⚠️
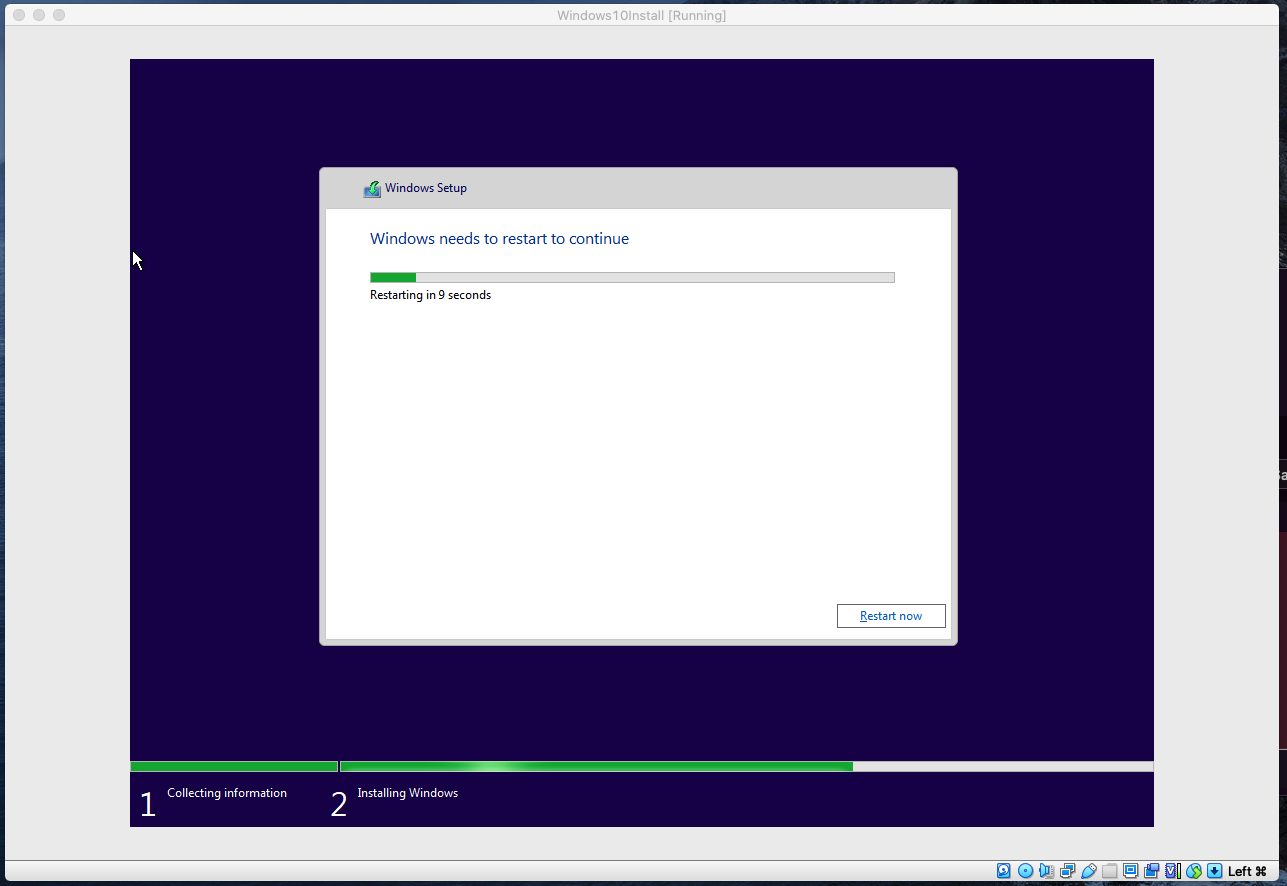
If you miss that and the virtual machine restarts, you will have to do it again.
Configuration to boot from the external drive
After canceling the installer and preventing it to restart, we need to restart our machine to boot from the external drive. The steps to follow depend on our hardware.
Macs without the T2 Chip
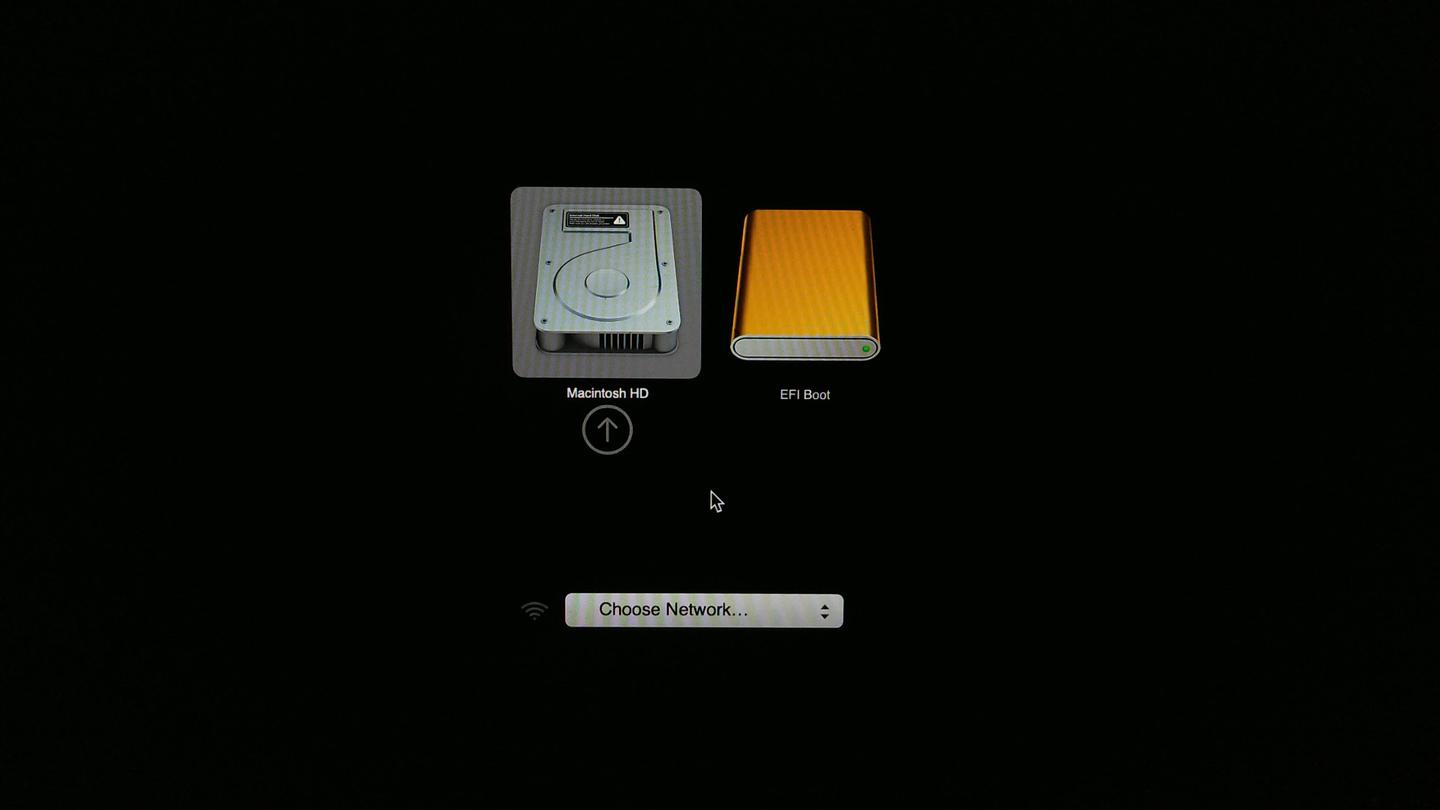
If your mac doesn’t have a T2 Chip, we can just keep pressed the ALT key
while the computer restarts. After a few seconds, it will ask us which device we want to use. We select the EFI Boot
device and Windows will continue with the installation and configuration.
Macs with the T2Chip
As I told you before, this is the moment in which you need to loosen the security restrictions a little bit. In our case, we have a MacBook Pro 16’ 2019 and we were fine with it.
Restart and press CMD+R to start the macOS Recovery application. You might be requested to log in using a user from the local computer. Select a user with administration permissions and continue:
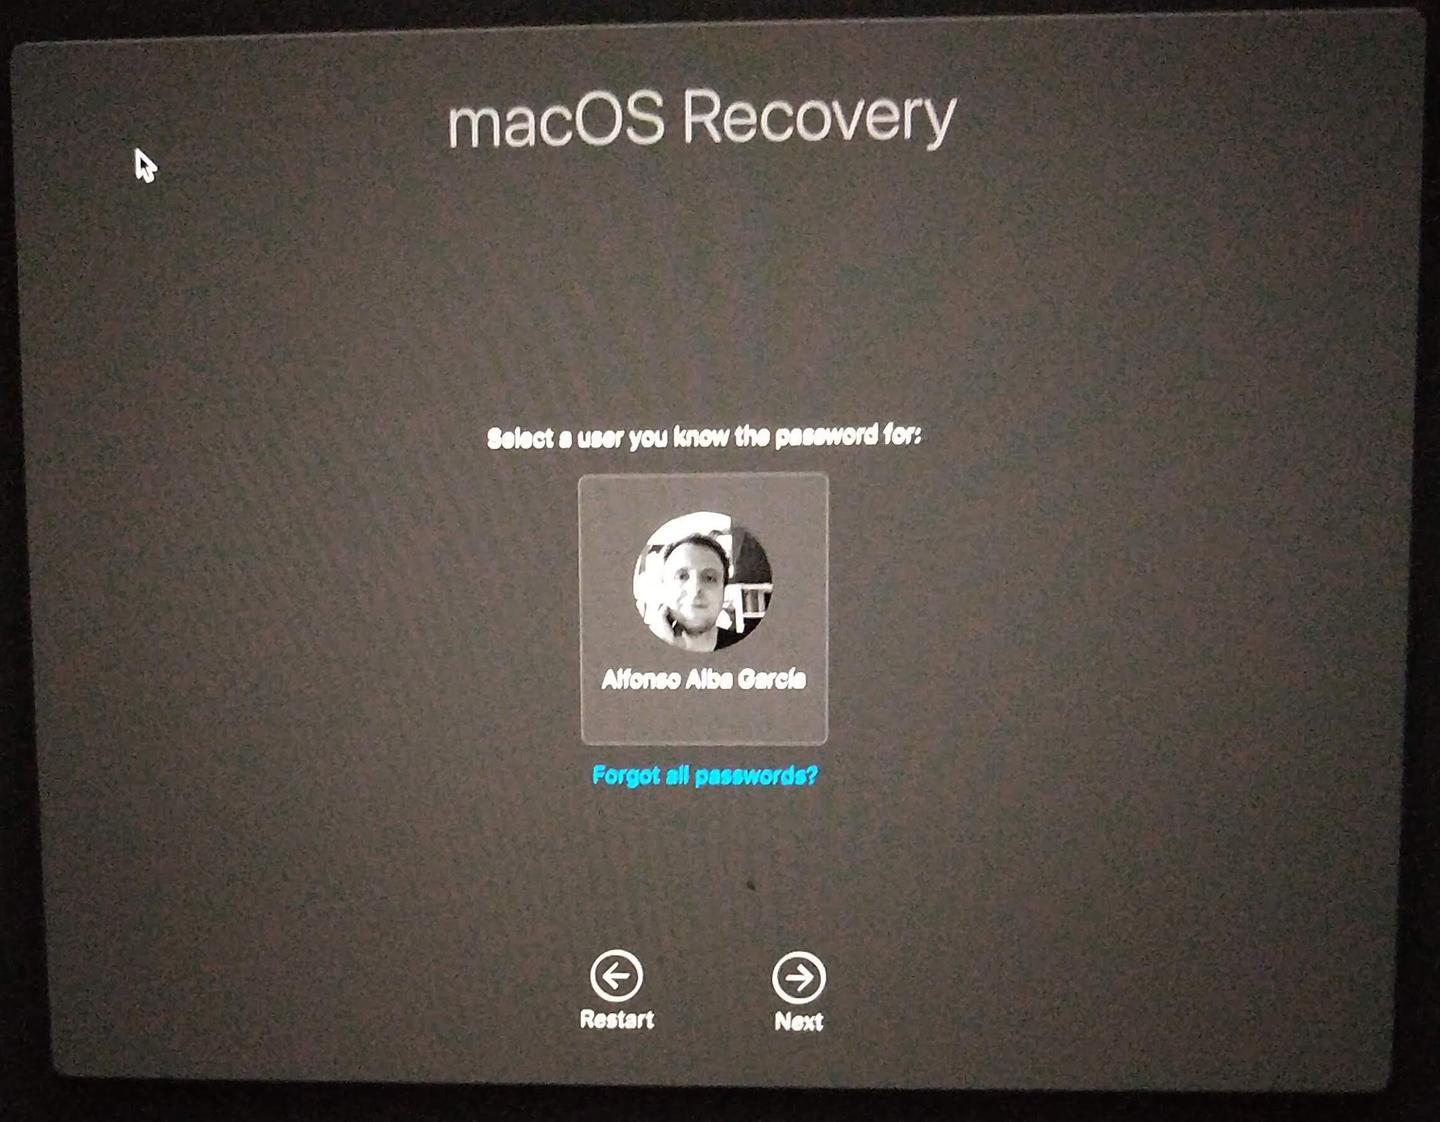
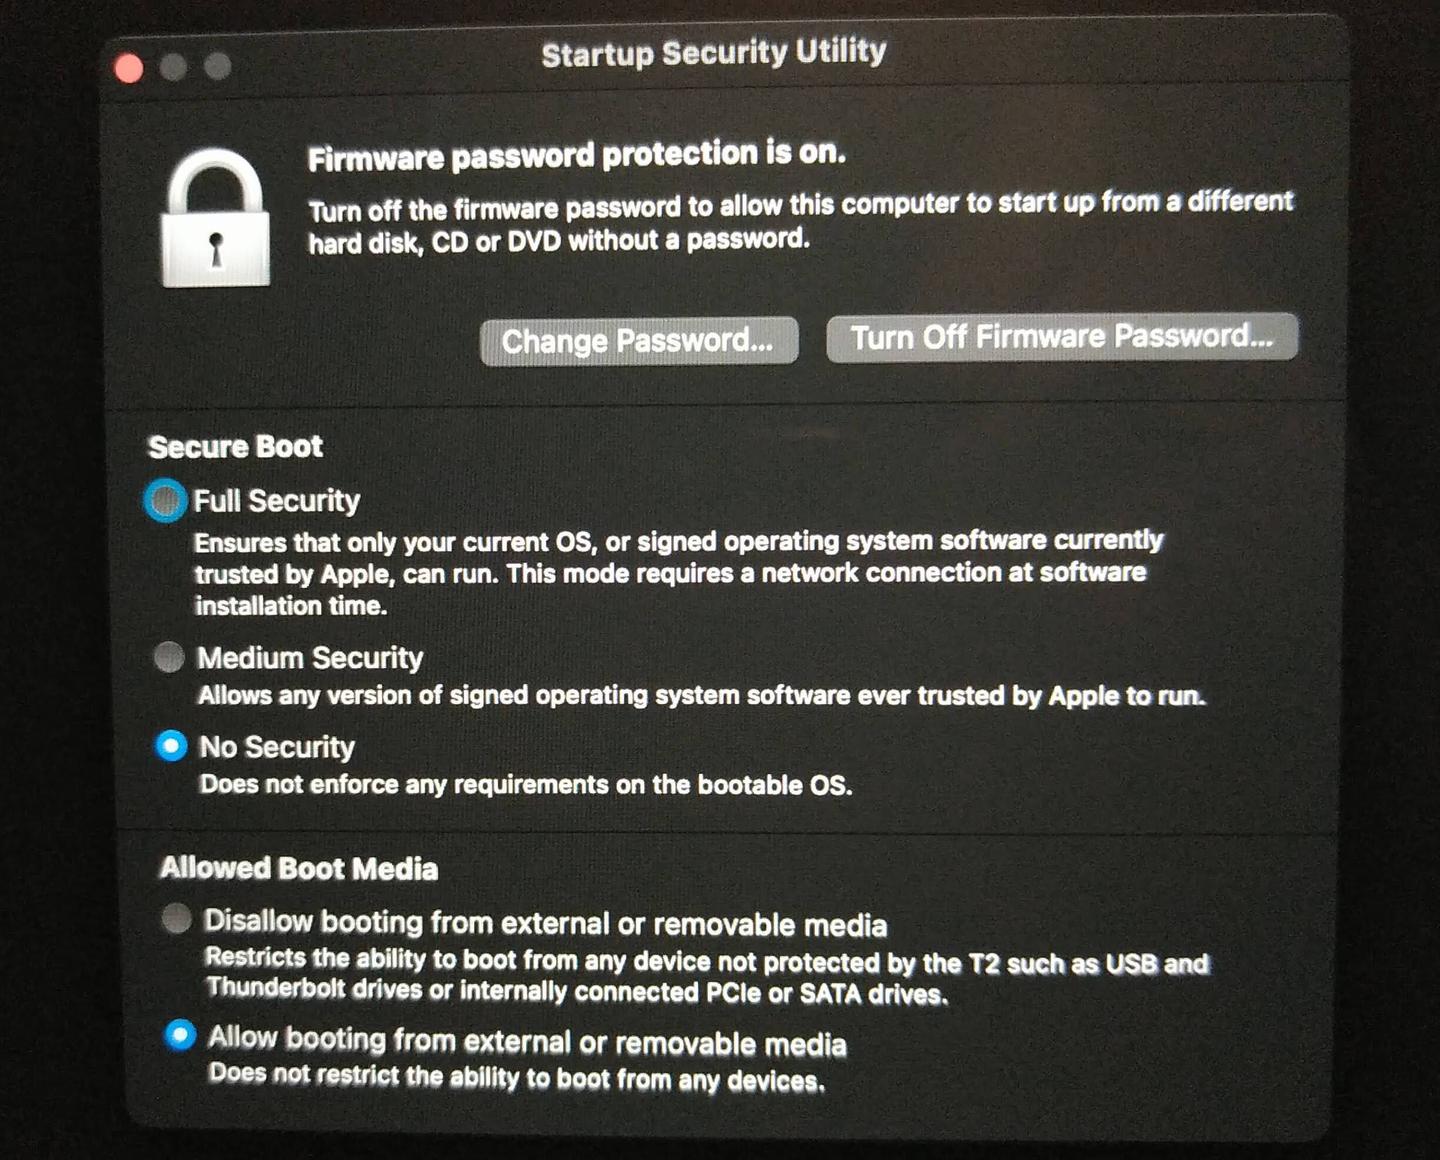
After logging in, we go to Utilities -> Startup Security Utility. We will be prompted to enter an administrator password
to proceed. This is the configuration that we are using to boot from the external drive:
- Turn on firmware password protection, so when somebody tries to boot from an external drive it will be prompted to enter a password. This is the only security that we will have to avoid booting from other drives.
- In the section
Secure Bootwe selected the option “No security”, since Windows 10 is not an operating system trusted by apple. - In the section
Allowed Boot Mediawe selected the option to allow booting from removable media.
After setting this configuration, we close the macOS Recovery application and restart the computer while pressing the ALT key. Since we activated the Firmware protection password, we get a prompt to enter it:
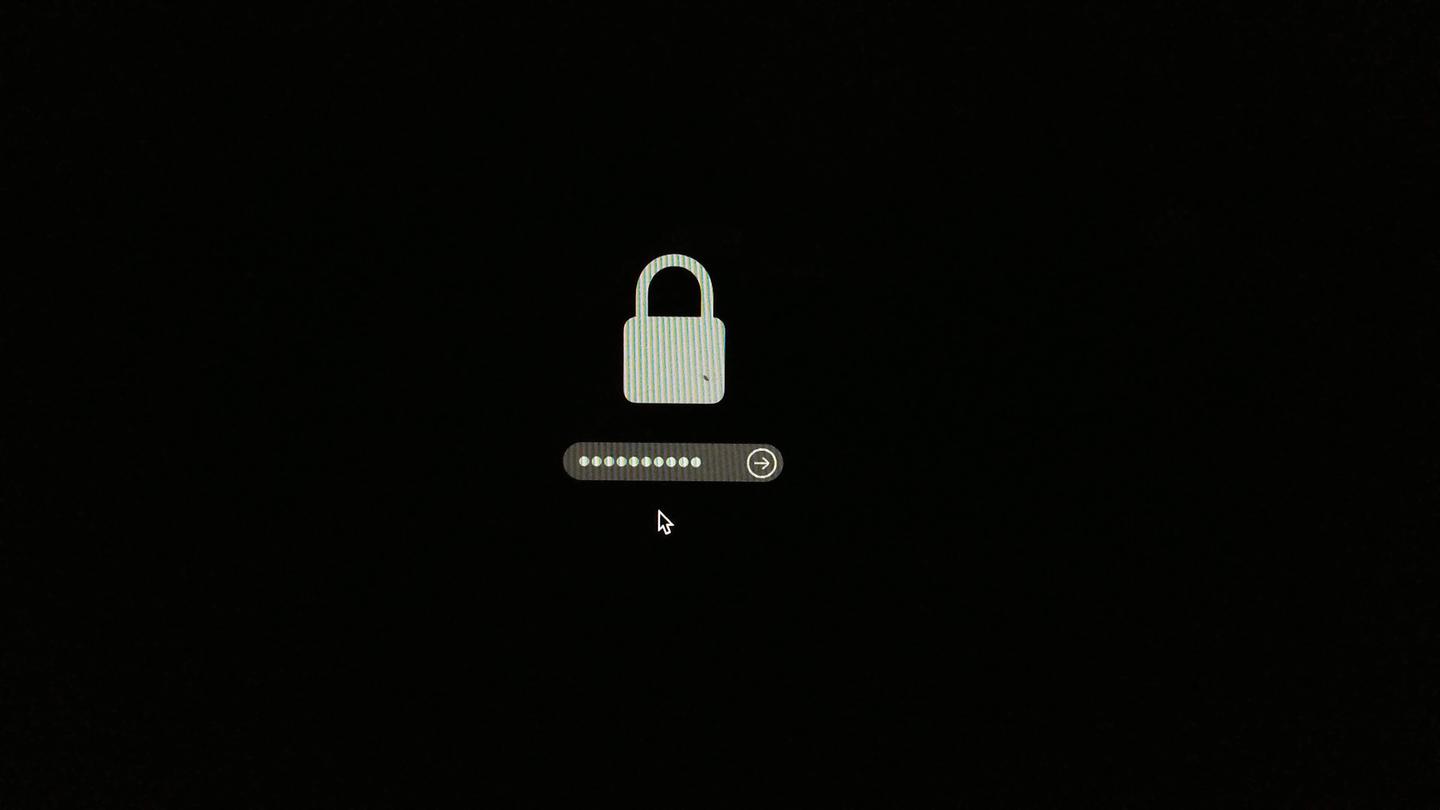
⚠️ Be aware that when you enter the password in this screen, the keyboard will be configured to be en english, so if the firmware password that you entered has especial characters like puntuation symbols or accents, you will have to type them as if you had a keyboard with an english layout ⚠️. Our mac has a Spanish keyboard and the firmware password contains some puntuation symbols; it took us a few long minutes to realize this before we could unlock the screen again.
After unlocking the screen, we will be able to select the EFI Boot device and the installation of windows will
continue.
Boot from the drive and finish the installation
Before booting from the Windows drive, we insert the external keyboard and the mouse because we didn’t include the drivers in the ISO image (see above). The drivers for the keyboard, the mouse and the rest of the hardware will be installed later when we install bootcamp in windows, so we can use the external USB devices while we finish the installation.
After the computer restarts and you select to boot from the external drive (see above), Windows will resume the installation and configuration. Just follow the steps of the wizard. During this process, windows will restart a couple of times so we had to keep an eye on the laptop to press the ALT key every time the computer rebooted.
Install bootcamp
Once the installation of Windows is done, boot your computer from the external drive into Windows and insert the USB stick.
Open a Windows Explorer window and navigate to WindowsSupport -> BootCamp inside the new USB device. Run the
Setup.exe program. After it’s done (it took about 5 minutes to install all everything), we will have to reboot the computer.
After restarting, we check the following:
- keyboard: display brightness, sound, backlights… everything should work
- trackpad: well, our mouse moved as expected
- we were able to connect to our Wifi network
- card reader could read SD cards
- we could change the display settings
Cleanup
After you are done with windows, we restarted our computer and went back to our macOS to do some cleanup:
- Open virtual box as root and remove the virtual machine
- Remove the .vmdk file.
- Reformat the USB stick using NTFS file systems so we can use it for whatever other things we need
And we are ready to go! Enjoy running you Windows in your Mac!
Links
The following links don’t include my Amazon affiliate ID so I won’t receive any comission if you buy any of the items:
Other posts that I found interesting while working on this: